
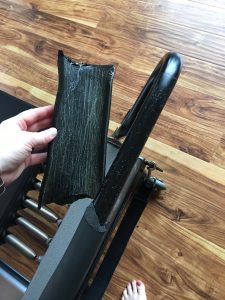
 After years of footwork in parallel, your footbar padding will get worn down. This may look like you’ve got two indentations and if your feet are on the bar it’s very, very hard in just those two spots because you can feel the metal beneath your heels.
(Note: When I talk about footbar padding I’m not talking about the vinyl sticky mat that velcros around over the top of the bar, but the neoprene padding between the cover and the aluminum bar.)
Conveniently, this padding is really easy to change. This procedure applies to the Inifinity footbar on a Studio or Clinical Reformer, the black Allegro Reformer, and a Classic or Revo footbar on the Studio Reformer.
First, you’ll need to order the correct footbar padding from your BB Sales Rep or distributor. The dimensions are slightly different so make sure you get the correct one. They will be able to help you determine what is correct for your Reformer.
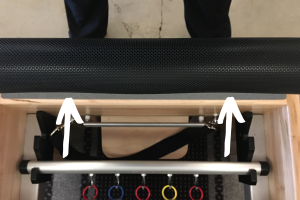
Second, remove the Velcro footbar cover. On older Reformers you will need to just undo the Velcro. However, if you have a cover that pulls tight on both ends with draw strings, keep the strings wrapped around the footbar, but just slide the cover to one side of the footbar and let it hang.
(Note: If you want to upgrade your footbar cover to one with drawstrings at both ends so it doesn’t slide sideways over time, you can! Just talk to your sales rep or distributor.)
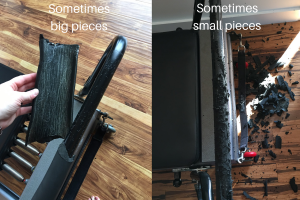
Now, you’re ready to start peeling off the old footbar padding. This can be the most frustrating part of the process because the padding may come off in a thousand tiny pieces. Don’t worry, just have patience. I’ve found that over time the best technique is to use your fingers to peel the adhesive part under the padding off, rather than just the padding. You can also try applying some heat to soften the adhesive before removing it.
Other times (lucky times!) the pieces come off in big chunks and it goes quickly.
Once the old padding is off, you are ready to apply the new padding. There is no need to make the footbar perfectly clean and smooth, because you are just going to cover it up again. Just make sure there are no thick chunks remaining.
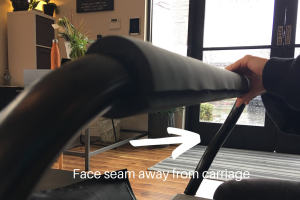
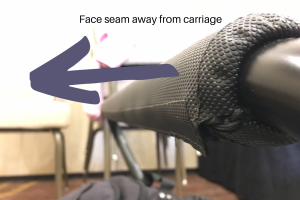
The new padding should be applied so the seam faces away from the carriage. I start by holding one short end of the padding in each hand, and visually aligning it so it’s centered on the footbar. Then, I smooth it all the way across in a line.
Next, wrap the middle of the padding around the middle of the footbar, and work your way outward, smoothing as you go.
Once the padding is secure, you are ready to re-attach the footbar cover. Make sure you face the Velcro seam away from the carriage.
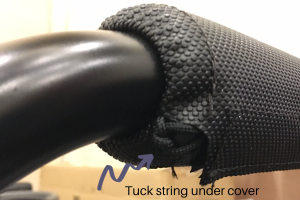
Re-tie the strings on each end (if present) and tuck them back under out of the way.
Now, you’re ready to enjoy your new, cushy, footbar.
This post originally appeared on the Balanced Body blog, here.